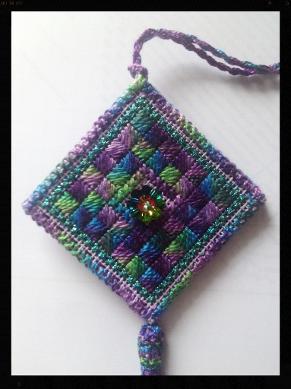
Carolyn Mitchell Designs


Have you ever wondered what my instructions and charting might be like to

follow.  Here is a free sample for you to try.
 
Check out:
COLOURCOMPLEMENTS.COM for all the delicious colours that they have in stock -

you might just want to do a few for gifts.


By the way what would I do with this item?  There are some ideas such as

Christmas Ornament, Bookmark, Luggage Tag, Key Tag, Scissor Fob, or Zipper

Fob.  Can you think of more?  Let me know and I will be happy to add them to the

list.


SUPPLIES

#18 Lavender Mono Canvas cut 4” by 7”

#5 Perle Cotton #120 COLOURCOMPLEMENTS.COM

#8 Perle Cotton #120 COLOURCOMPLEMENTS.COM

#8 Kreinik Braid #684 or #029

2 - 12mm Margarita Swarovski crystals

#22 and #24 Tapestry needles

The above thread supplies will make two, two-sided ornaments including tassels and ties

Using Masking tape cover all the edges of the canvas to prevent the threads from catching.

Fold the canvas in half to create a 4” by 3 ½” piece.

Count over three mesh from the centre fold in the centre to start.

Follow the chart and use #8 Braid to stitch the Double Straight Cross Stitches.

Follow the chart and use #5 Perle Cotton to stitch the Four Way Flat Stitch

Follow the chart and use #5 Perle Cotton to place the Cross Stitches.

When complete count over a total of six mesh and make the second side identical to the first side making sure it lines up perfectly.

Place a 12mm Margarita Swarovski crystal in the centre on each design for added sparkle.


ASSEMBLE:

Trim the canvas back to 10 mesh on all four sides. Fold the canvas back so that 3 mesh are visible.

Carefully cut away the four corners so the edges will fold and lay flat.

Follow the Binding Chart and use #8 Perle Cotton stitch around all four sides and down the folded centre.

Using #8 Perle Cotton place the waste knot as shown. Bring thread over the fold and insert the needle from the front to

the back. (#1 to #2)

Bring the needle and thread over the fold an insert the needle to the back (#3 to #4).

Bring the needle and thread over the fold and insert the needle to the back (#5 to #6)

Continue to follow the numbers to complete the binding.  When you come to a corner take three or four stitches to turn.

CORDING


Cords are great for ties to hang ornaments.  It gives your items the professional finished look.

·         Desired length of thread we will use is 36”. Double this back and knot the ends together.

·         Using a “Spinster” pencil, fingers or mixer, twist the threads tightly until they begin to kink back on themselves.  This may take a while if doing it by hand.

·         Fold the twisted thread together until the ends meet.

·         Place a fishing weight at the centre  point to help create a more even twist.

·         Transfer your grip so that both ends are held in one hand with the weight hanging down.  Let the cord twirl until it starts to reverse, then take the weight off.

·         Gently straighten cording if need be.  Use and enjoy.


LACY HEAD TASSEL


·        Cut a piece of cardboard to the desired length of the tassel.  Wrap thread on this cardboard to the required thickness.

·       Cut a length of thread about10”.  Bring this thread through one end of the wrap and tie the bundle of threads together tightly with a knot.  The left over thread can be used to fasten the tassel to an ornament.

·         Slip the bundle of threads off the cardboard.

·       Cut another length of thread around 40".  Hide the tail of the thread in the skirt of the tassel and bring the thread up to where the neck should be located.  Wrap the neck 5 to 10 times very tightly.

·     Thread the other end of the 40" thread with a blunt needle and work detached buttonhole stitch around the wrapped portion of the neck.  Connect the two buttonhole stitches when they meet.  These stitches can be close together or slightly spaced creating different effects.  You can stop at this point and have a lovely  tassel.

·        To create the lacy crown, continue working detached buttonhole stitches around and around by going into the spaces between the stitches in the  previous row.  If you work loosely you can pull the stitching up to the top by weaving the thread through all the loops going around pulling up to the top and then snug to tie it off.  This creates a lacy effect. Hide all ends in the skirt of the tassel.

·         Cut the other end of the tassel, trim and attach.